Data acquisition
In this lesson, you learn how to power on and start the local smart thermostat application. The application reports collected data to the logs, including current temperature, ambient noise level, HVAC status (heating, cooling, standby), and room occupation indicator.
The Core2 for AWS device has several sensors that are ready to use. For this tutorial, you collect readings from the temperature sensor and microphone using local application code. The application keeps track of sensor readings and status flags that are used to render a summary to the display.
How to program the thermostat application
Your smart thermostat samples the integrated sensors by using code that is created and included in the bundled software components. The first step is capturing the values and printing them out to the logger, before publishing sensor values to AWS IoT Core.
The following sample code illustrates capturing data from the temperature sensor module (MPU6886):
// include libraries for interfacing with the kit's modules
#include "freertos/FreeRTOS.h"
#include "core2forAWS.h"
#include "mpu6886.h"
#include "esp_log.h"

// the application to run on the device
void app_main()
{
  // initialize a float to store our temperature reading
  float temperature = 0.0f;

  // initialize the kit modules
  Core2ForAWS_Init();
  MPU6886_Init();

  // read from the temperature sensor
  MPU6886_GetTempData(&temperature);

  // convert the reading to Fahrenheit and apply a calibration offset of -50
  temperature = (temperature * 1.8) + 32 - 50;

  // write the value to the ESP32 logger
  ESP_LOGI("thermostat", "measured temperature is: %f", temperature);
}
If you use this code to build, flash, and monitor your device, the device takes one reading from the temperature sensor, writes it to the logger, and stops. To continuously sample every second without blocking other processes, you must create a separate FreeRTOS task and pin it to an MCU core.
The following sample code illustrates continuously collecting temperature readings every 1,000 milliseconds (1 second):
#include "freertos/FreeRTOS.h"
#include "freertos/task.h"
#include "core2forAWS.h"
#include "mpu6886.h"
#include "esp_log.h"

// store our application logic in a task function
void temperature_task(void *arg) {
  float temperature = 0.0f;

  // loop forever!
  for (;;) {
    MPU6886_GetTempData(&temperature);
    temperature = (temperature * 1.8) + 32 - 50;
    ESP_LOGI("thermostat", "measured temperature is: %f", temperature);

    // sleep for 1000ms before continuing the loop
    vTaskDelay(1000 / portTICK_RATE_MS);
  }
}

void app_main()
{
  Core2ForAWS_Init();
  MPU6886_Init();

  // FreeRTOS concept: operations that run in a continuous loop are done in tasks
  xTaskCreatePinnedToCore(&temperature_task, "temperature_task", 4096, NULL, 5, NULL, 1);
}
Compile and upload the smart thermostat firmware
A sample application has already been prepared for you to build and upload to your device using Visual Studio Code (VS Code) and the PlatformIO (PIO) extension.
Complete the following steps to upload the application to your device:
- Open VS Code, if necessary.
- Expand the File menu and choose New Window in the VS Code to open a new window. This provides a clean file Explorer and working environment.
- Select the PlatformIO logo in the VS Code activity bar, choose Open, and then choose Open Project.
- Navigate to the
Core2-for-AWS-IoT-EduKit/Smart-Thermostatfolder and choose Open Smart-Thermostat.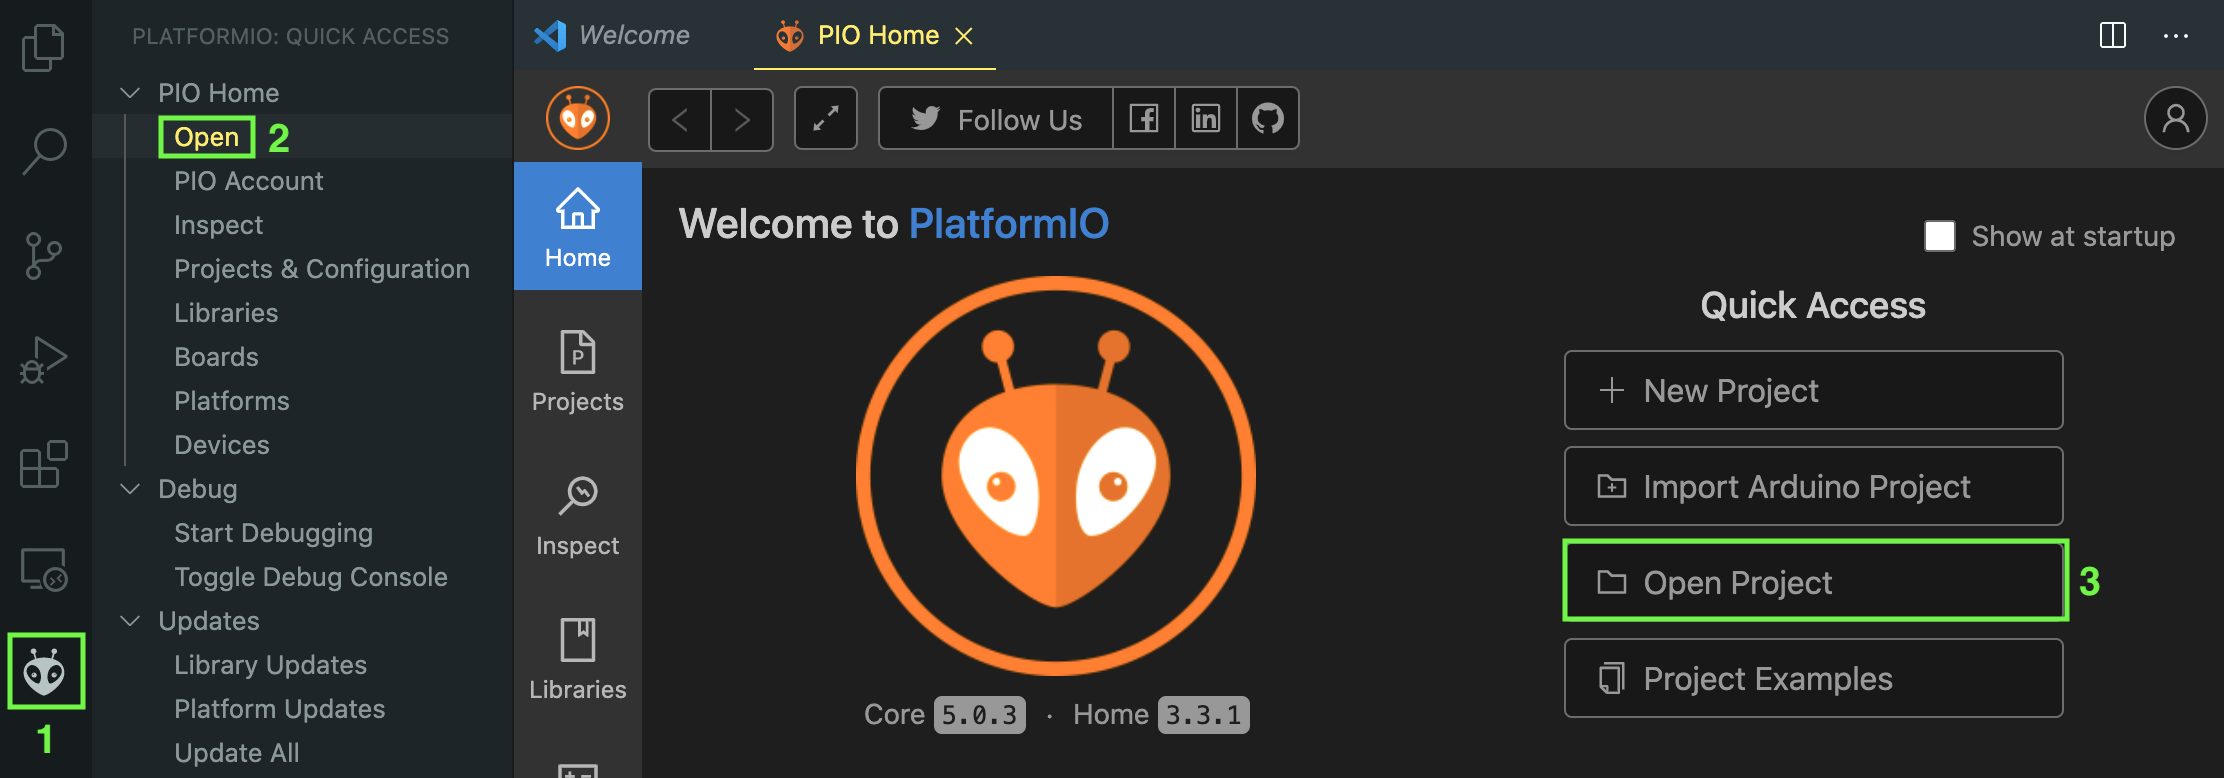
- Select the PlatformIO logo in the VS Code activity bar, expand Miscellaneous, and then choose New Terminal.
Next, you will utilize the local Wi-Fi and AWS endpoint configuration that you established during the CloudConnected Blinky tutorial.
If you did not complete the CloudConnected Blinky tutorial or you prefer to set your Wi-Fi credentials and AWS endpoint manually, follow the Configure the ESP32 firmware steps from the Blinky Hello World tutorial.
Complete the following steps to copy the configuration from the Blinky project, compile the device firmware, and upload it to your device. (Expand and complete the directions that correspond to your host machine’s operating system):
Validation
Validate that your device is configured as intended by reviewing the serial output in the terminal window. Your output should look similar to the following:
I (16128) MAIN: On Device: roomOccupancy false
I (16132) MAIN: On Device: hvacStatus STANDBY
I (16137) MAIN: On Device: temperature 64.057533
I (16143) MAIN: On Device: sound 8
Now that the serial output is configured, continue to Data sync .
Questions? Please use AWS re:Post
AWS IoT Kit now features direct access to
AWS re:Post
, which is a community-driven, questions-and-answers service. Search re:Post using the
AWS IoT Kit
tag to see if your question has been asked and answered. If not, ask a new question using the AWS IoT Kit tag.