Windows 10 Set Up Instructions
This lesson guides you through configuring your Windows computer (host machine) to download, view, and edit code from the Core2 for AWS GitHub repository. After you complete these steps, your computer is ready to compile and upload code to the hardware’s flash memory. These steps are required to install the ESP RainMaker agent.
Install Git and its dependencies
Git is a widely adopted distributed version control system that is commonly used for source code management and collaboration. Git also lets users track file changes, and distribute code between a local machine and a remote server (for more information, see About Git ).
OpenSSL provides a toolkit for secure communication to the Git repository (for more information, see OpenSSL ).
Complete the following steps to install OpenSSL, Git, and Git’s dependencies:
- Download and install OpenSSL .
- Download and install
Git for Windows
.
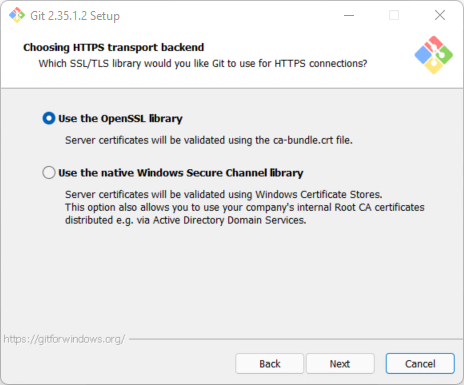
- When you install Git for Windows, use the default options and be sure to choose Use the OpenSSL library in the Choosing HTTPS transport backend installer page.
Set up Silicon Labs USB-to-UART bridge
The device communicates with the host machine through a Silicon Labs CP210x USB-to-UART bridge. The on-board CP2104 bridge facilitates host communication with the ESP32-D0WD microcontroller. The microcontroller communicates bi-directionally over UART 0, which the CP210x bridge translates through a virtual communication port on the host machine.
Before you can mount the virtual serial port and communicate across it, you must download and install the supporting driver. Complete the following steps to install the driver for the CP2104 bridge:
- Ensure the device is not connected to the host machine.
- Download the Windows Silicon Labs CP210x driver. (For more information, see the Silicon Labs, Downloads page.)
- Extract the downloaded file.
You must extract the contents of the folder, because the driver will not install if the executable runs within the archive. However, it is not important where you save the extracted folder on your host machine.
- Download the Windows Silicon Labs CP210x driver here .
- Extract the contents of the download.
- Open the folder, right-click the silabser.inf file, and choose Install.
- Restart your host machine to make sure the driver is applied.
If your Core2 for AWS does not show up in the list of devices, check that it’s powered on and you are using the supplied USB-A to USB-C cable. Some USB-C hubs have compatibility issues with establishing a serial port.
Python installation
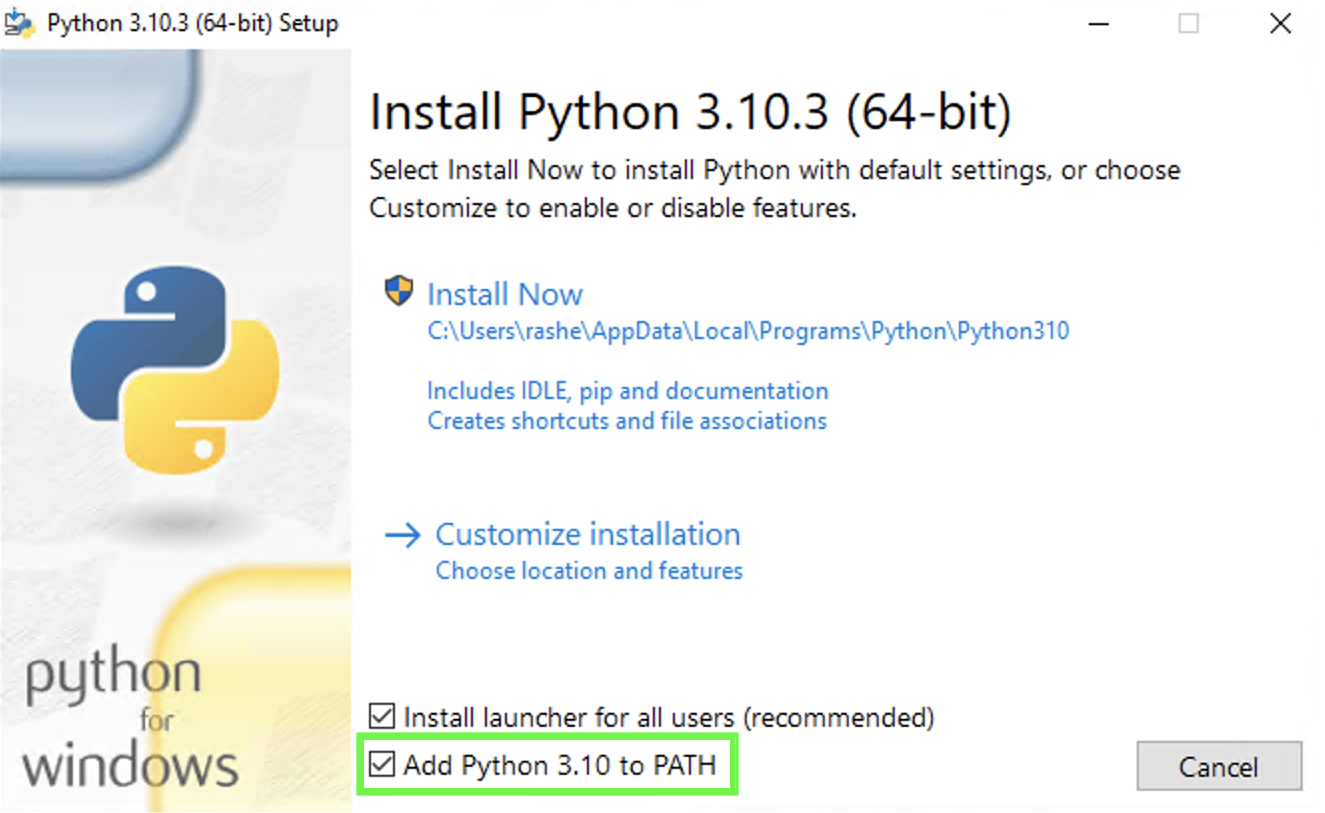
Python is an interpreted language that is used by the PlatformIO installer that you’ll run later. If you don’t have Python installed on your host machine, download it from here . Make sure that the option to “Add Python to PATH” is checked.
Visual Studio Code installation
Visual Studio Code (VS Code) is an open source integrated development environment (IDE) that allows you to view, edit, and manage code and more. Download the latest Visual Studio Code for your operating system. To troubleshoot issues with Visual Studio Code installation or usage, refer to their documentation .
- Download and install the latest VS Code software for your operating system. To troubleshoot issues with Visual Studio Code’s installation or use, refer to Setting up Visual Studio Code in their documentation.
Install PlatformIO
PlatformIO (PIO) provides a professional embedded development platform that simplifies embedded software development. This VS Code extension combines the functionality of the Platform IO command line interface (CLI) with a graphical user interface (GUI).
Complete the steps outlined in PlatformIO’s installation instructions to download and install the VS Code extension.
Restart VS Code after the PIO installation completes.
Clone the code repository
All of the projects exist in a GitHub repository . Through this repository, you can clone the instructions, and view the revision history of each file in the repository.
Complete the following steps to clone the code for the tutorials:
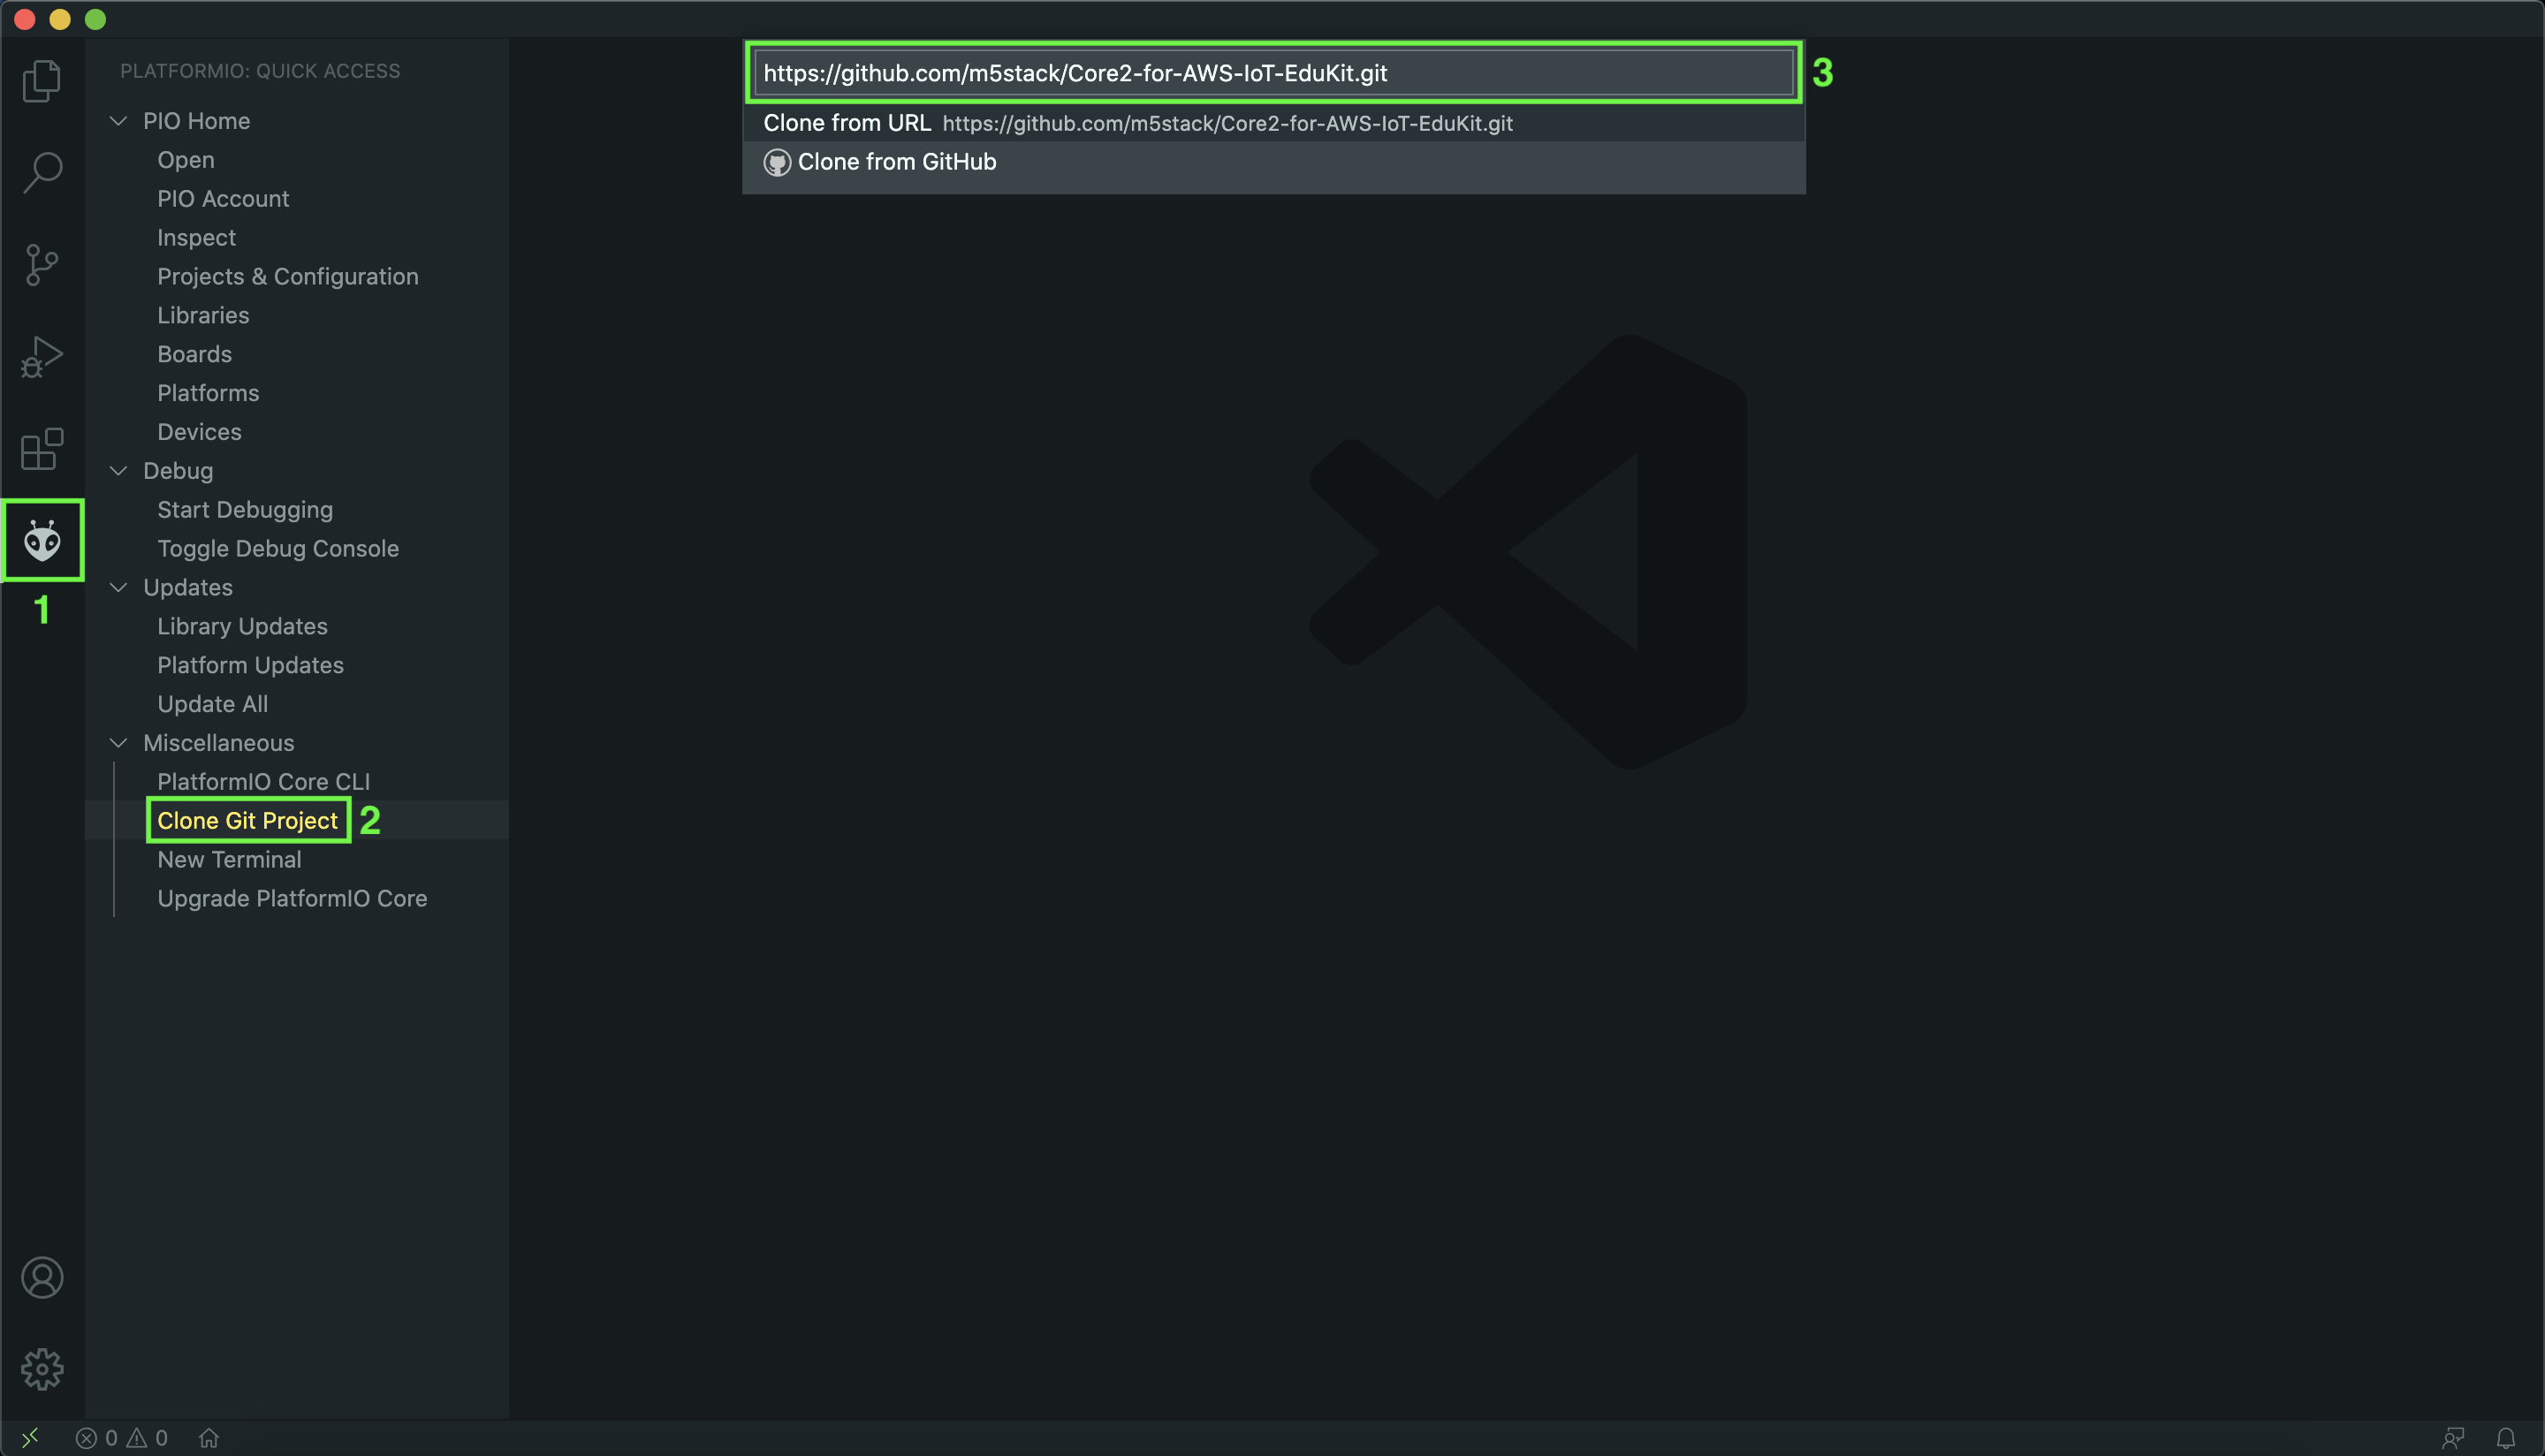
- Choose the PlatformIO logo on the VS Code activity bar to open PlatformIO’s Quick Access menu.
- Expand Miscellaneous and choose Clone Git Project.
- Copy the following URL and paste it into the target field at the top of the page.
https://github.com/m5stack/Core2-for-AWS-IoT-EduKit.git - Select the location where you want to save the project.
Download and install the phone app
The ESP RainMaker phone application is available for iOS and Android phones to provide Wi-Fi network configuration, user-creation, user-device association, and device control.
Install the ESP Rainmaker application through:
- Android: Google PlayStore , Direct APK
- iOS: Apple App Store
If you don’t have a compatible Android or iOS device, follow the ESP RainMaker CLI Setup instructions.
Identify the device communication port
If you haven’t already, unbox the Core2 for AWS and connect it to your host computer’s USB 2.0 port using the supplied USB-A to USB-C cable. (You do not need to use the hex key that is included at this time. This key is used to install additional modules that are sold separately.)
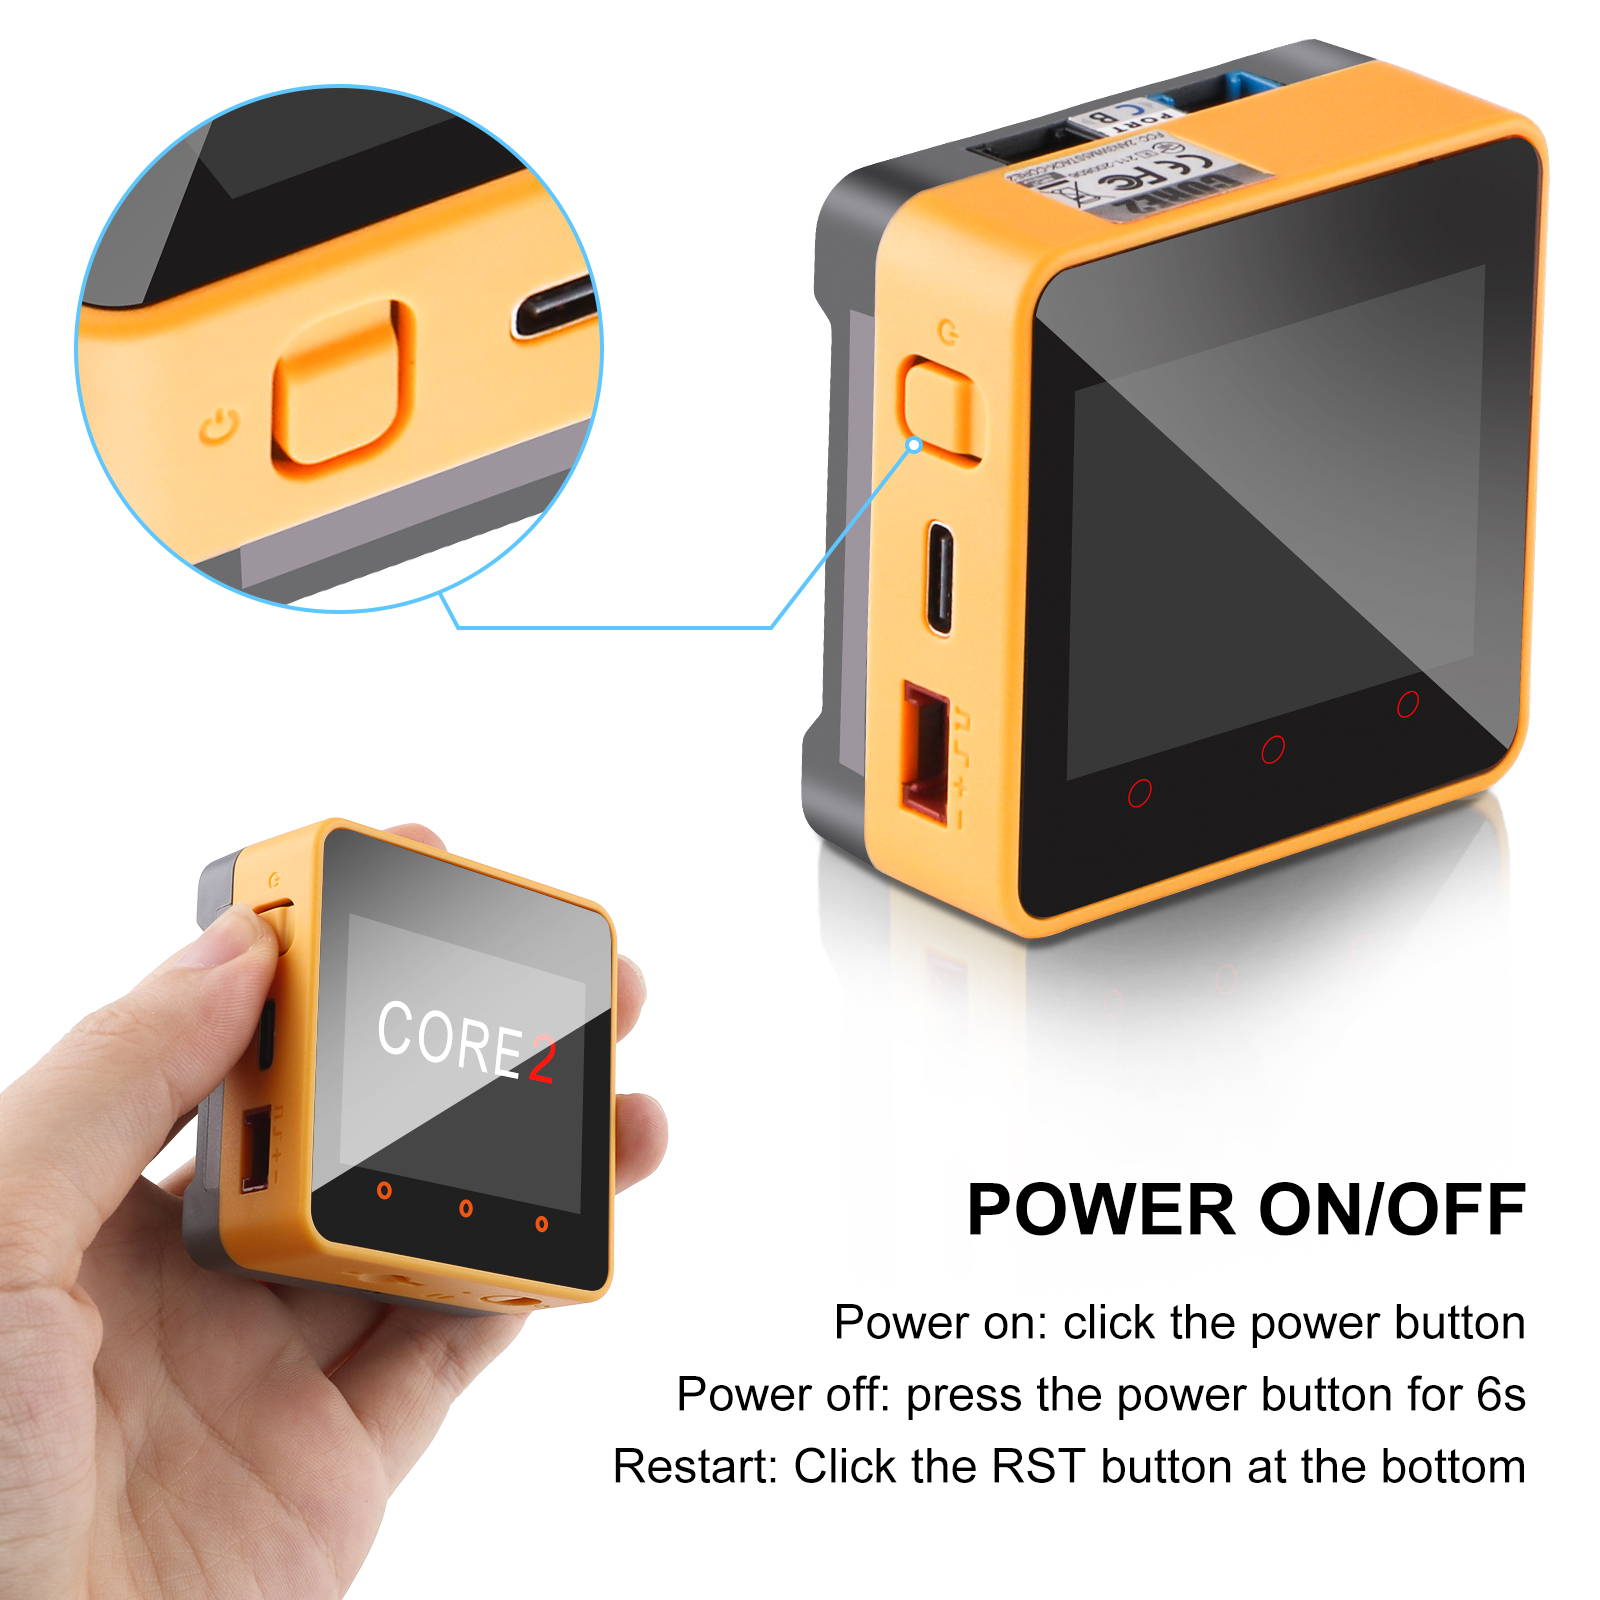
The device should automatically turn on when you plug it in. If it doesn’t, press the power button.
Now that the device is ready and the prerequisite software is installed, let’s identify the virtual port your device is using so that you can correctly route read and write operations.
- From PlatformIO’s Quick Access menu, expand PIO Home, and select Devices.
- Choose the icon next to the port with the description Silicon Labs CP210x USB to UART Bridge (this is usually
COM3). Write down the device port number. (Note: When you disconnect and reconnect the device to your host machine, the port number can change. Be sure to confirm this port each time.)
If your Core2 for AWS does not appear in the device list, confirm that it’s powered on and you are using the supplied USB-A to USB-C cable. Some USB-C hubs have compatibility issues with establishing a serial port.
Next
Now that your host machine can communicate with the Core2 for AWS, continue to the next chapter — Run the ESP RainMaker Agent .
Questions? Please use AWS re:Post
AWS IoT Kit now features direct access to
AWS re:Post
, which is a community-driven, questions-and-answers service. Search re:Post using the
AWS IoT Kit
tag to see if your question has been asked and answered. If not, ask a new question using the AWS IoT Kit tag.