Device Provisioning
In this lesson, you provision your Core2 for AWS to connect to AWS IoT Core, using the on-board Microchip ATTECC608 Trust&GO secure element to establish a TLS connection . The built-in hardware root of trust provides a simplified and expedited provisioning path, while not exposing the private key. You can retrieve the device certificate ( public key ) that is built into the device to create a AWS IoT thing (a virtual representation and record of your device). The secure element’s unique serial number is used as the client ID to register and identify the device in AWS IoT Core. You can use similar processes to automate the fleet deployment of thousands or millions of devices at a time.
Open the Blinky Hello World project
Complete the following steps to open the Blinky Hello World project:
- Open VS Code, if necessary.
- Expand the File menu and select New Window in the VS Code to open a new window. This provides a clean file Explorer and working environment.
- Choose the PlatformIO logo in the VS Code activity bar, choose Open, and then choose Open Project.
- Navigate to the
Core2-for-AWS-IoT-EduKit/Blinky-Hello-Worldfolder and choose Open “Blinky-Hello-World.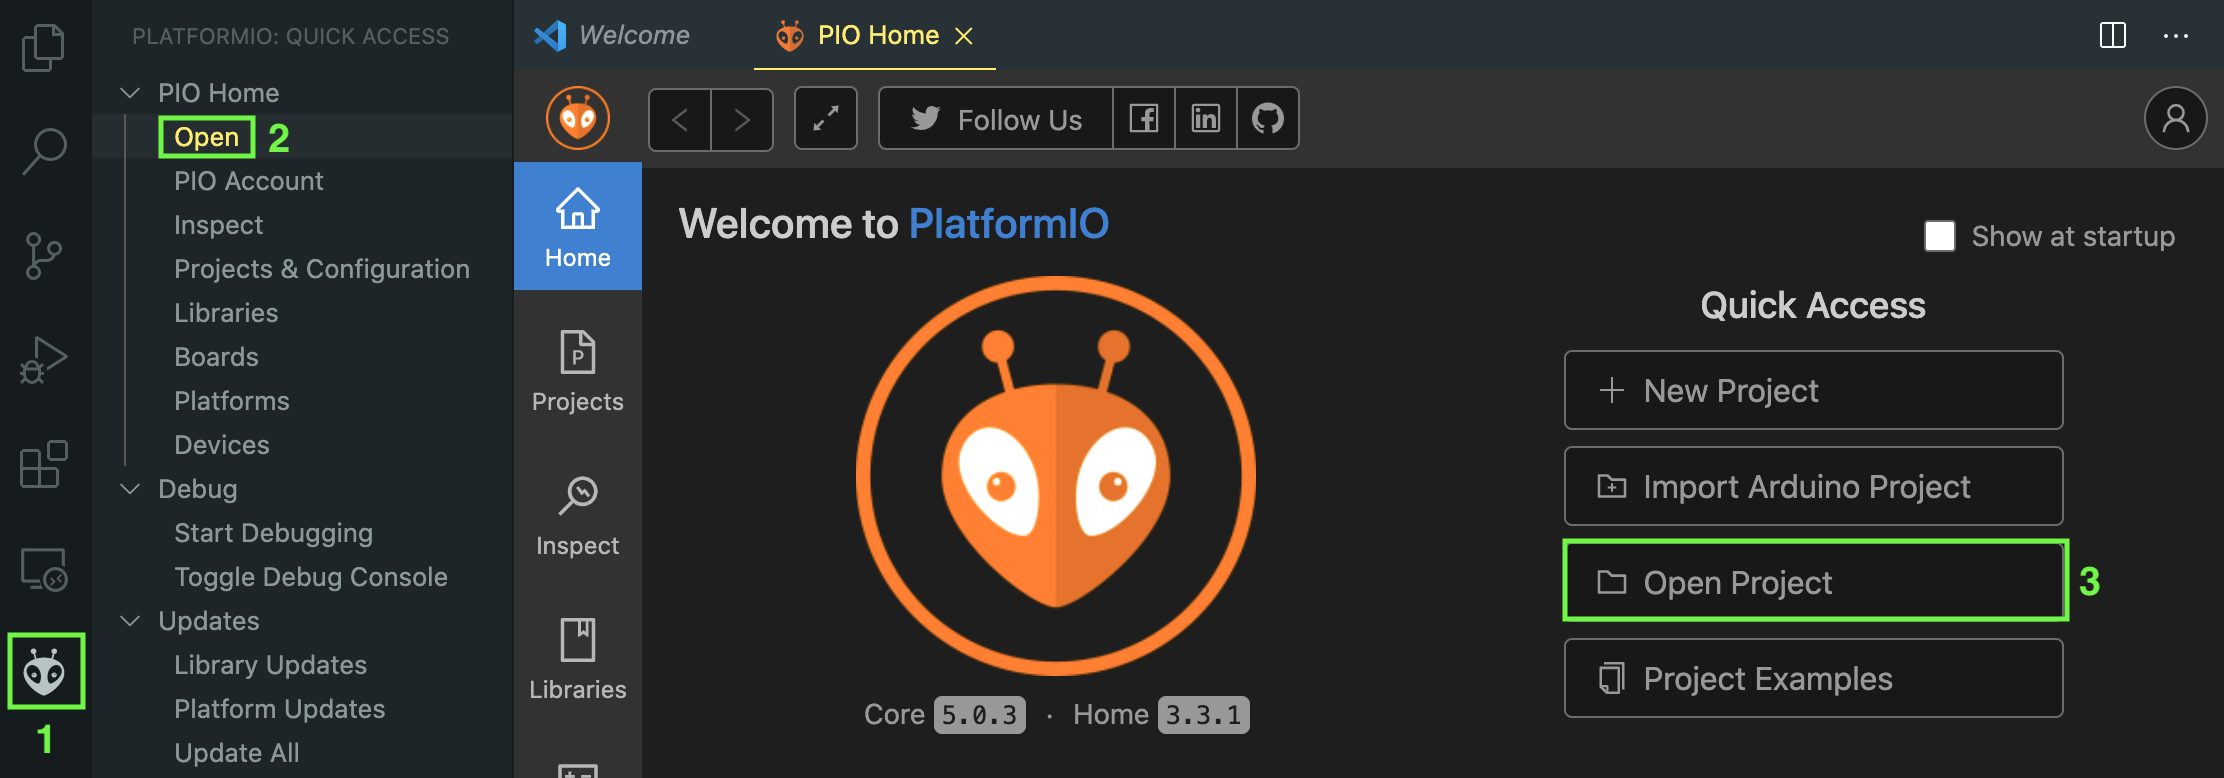
Retrieve the device certificate and register your AWS IoT thing
To create a secure TLS connection over MQTT with AWS IoT Core, you must register a thing, attach the device certificate (public key) to the thing, and attach a security policy to the certificate. This process ensures that rogue devices or rogue operations are not performed within your AWS account.
The secure element on the Core2 for AWS lets you automate the device registration process without exposing or handling sensitive, private keys. The script to automate this process is included in the project folder and performs the following tasks:
- The script retrieves the pre-provisioned device certificate from the device’s secure element, places the device certificate and additional device metadata into a manifest file, and signs the manifest file with a locally generated X.509 certificate .
- The script uses the
Microchip TrustPlatform tools
to read the manifest file from the disk, verifies that the contents have not been altered (tampered), and registers the microchip (secure element) using a
just-in-time registration
process and the microchip manufacturer’s Certificate Authoritiy (CA).
- During the registration process, the AWS IoT creates a thing, creates a device certificate and attaches it to the thing, creates a secure policy and attaches it to the certificate, and adds the AWS IoT MQTT broker endpoint address to the device’s firmware configuration.
Complete the following steps to register your device with AWS IoT Core:
- Connect your Core2 for AWS to your host machine. Be sure that the device is powered on – if you flashed the firmware from the Getting Started tutorial, your device will make a quiet clicking sound when it’s powered on.
- Issue the following commands in the PlatformIO CLI terminal window to run the registration helper script:
cd Blinky-Hello-World
pio run -e core2foraws-device_reg -t register_thing
Conclusion
In this lesson, you used the secure element and registration script to create an AWS IoT thing , create a permissions policy for your thing, attach the policy to the device certificate, and attach the device certificate to the thing. All of this was done without exposing the private key, and your device was was protected against being compromised.
Now that your device has been provisioned in AWS IoT Core, continue to Connecting to AWS IoT Core .
Questions? Please use AWS re:Post
AWS IoT Kit now features direct access to
AWS re:Post
, which is a community-driven, questions-and-answers service. Search re:Post using the
AWS IoT Kit
tag to see if your question has been asked and answered. If not, ask a new question using the AWS IoT Kit tag.