Machine learning
Introduction
By the end of this chapter, your serverless application should do the following:
- Train a machine learning model that translates new thermostat messages into inferences of roomOccupancy.
- Host a machine learning model on an API endpoint for consumption.
Train a machine learning model
Data science and machine learning are enormous domains in their own right. It is far beyond the scope of this module to teach the basics of how machine learning model training works. Fortunately, the tool chain for creating new models has been simplified to the point that we can use that tool chain to experiment with ML just by knowing enough about our data.
In this solution, you are trying to replace a simple threshold in the IoT Core rules engine that evalutes the sound level reported by the device and coerces a new Boolean key-value called roomOccupancy. You know from looking at the sound data in the reported messages that the values are low when it is quiet and higher when there is noise. That’s how you know a simple threshold like “greater than 10” was an okay starting place to generate the roomOccupancy value. (In your specific case, a different threshold for ambient noise versus registered activity may have been more appropriate!)
You will apply a similar approach by giving the machine learning tool chain a sample of thermostat data recorded from the room where your device is deployed and telling the training job “this is what the data looks like when the roomOccupancy should be true, and what it looks like when it is false.” The training job will evaluate your data set, target the roomOccupancy column, and try to build a model that accurately reproduces roomOccupancy values based on the sound level ranges and even the other columns like time, HVAC status, and temperature.
Once your first model is trained, in the following chapter you will_replace_ that simple static threshold on the sound level with the inferred classification of roomOccupancy as determined by your model!
Set up the serverless infrastructure
First, you will set up Amazon SageMaker Studio in order to configure a new experiment for automatic model training.
- Go to the Amazon SageMaker console and choose Amazon SageMaker Studio.
- Select Quick start and optionally enter a new User name.
- For Execution role select the drop down and choose Create a new IAM role.
- For S3 buckets you specify select None and then choose Create role. The other defaults for buckets with “sagemaker” in the name are sufficient for this project.
- Choose Submit to start the provisioning process of SageMaker Studio. This step will take a few minutes to complete on your behalf.
Once your SageMaker Studio has finished provisioning, the next step is to open your Studio and configure a new project.
- From the SageMaker Studio Control Panel, choose Open Studio.
- In the Launcher tab, choose New project.
- Under SageMaker project templates select MLOps template for model building, training, and deployment then choose Select project template.
- Give your project a name and description, then choose Create project.
Once the project is created, you will see a project dashboard with tabs like Repositories, Pipelines, Experiments, and so on. Leave this browser tab open to SageMaker Studio so you can quickly return to this page.
The next task is to return to AWS IoT Analytics so you can export the aggregated thermostat data for use by your new ML project.
- Open the
AWS IoT Analytics console
and choose your data set (assumed name is
smartspace_dataset). - Under Data set content delivery rules choose Edit.
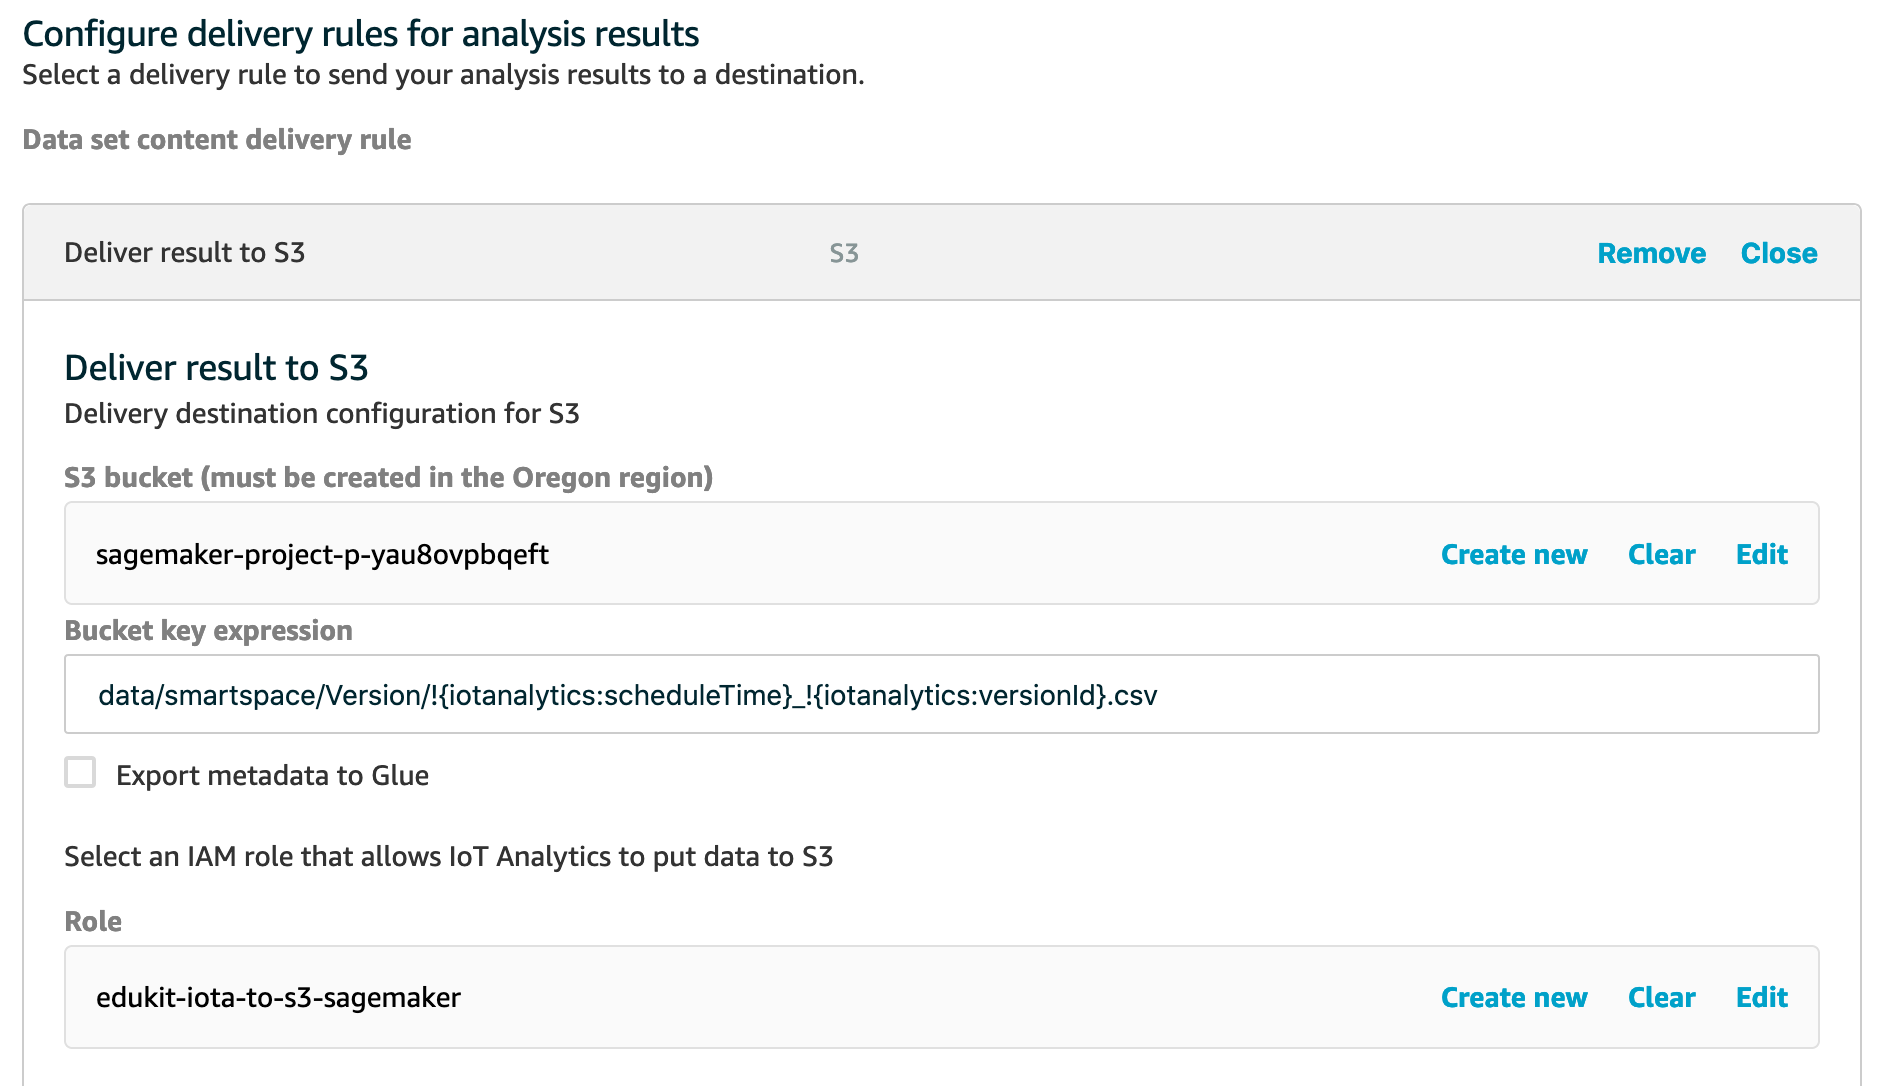
- Choose Add rule, then choose Deliver result to S3.
- Under S3 bucket choose Please select a resource and find the S3 bucket created for your SageMaker Studio project. It will be named like
sagemaker-project-p-somehashhere. If there are multiple buckets named like this, you’ll need to check the SageMaker Studio project for the random hash ID of your project. You can see the hash in other resources of your project like the Repositories and Pipelines tabs. - Under Bucket key expression use this expression:
data/smartspace/Version/!{iotanalytics\:scheduleTime}_!{iotanalytics\:versionId}.csv - Under Role choose Create new and provide a name for the IAM role that will grant IoT Analytics access to write data to your S3 bucket. Choose Create role.
- Choose Save to finalize your new delivery rule.
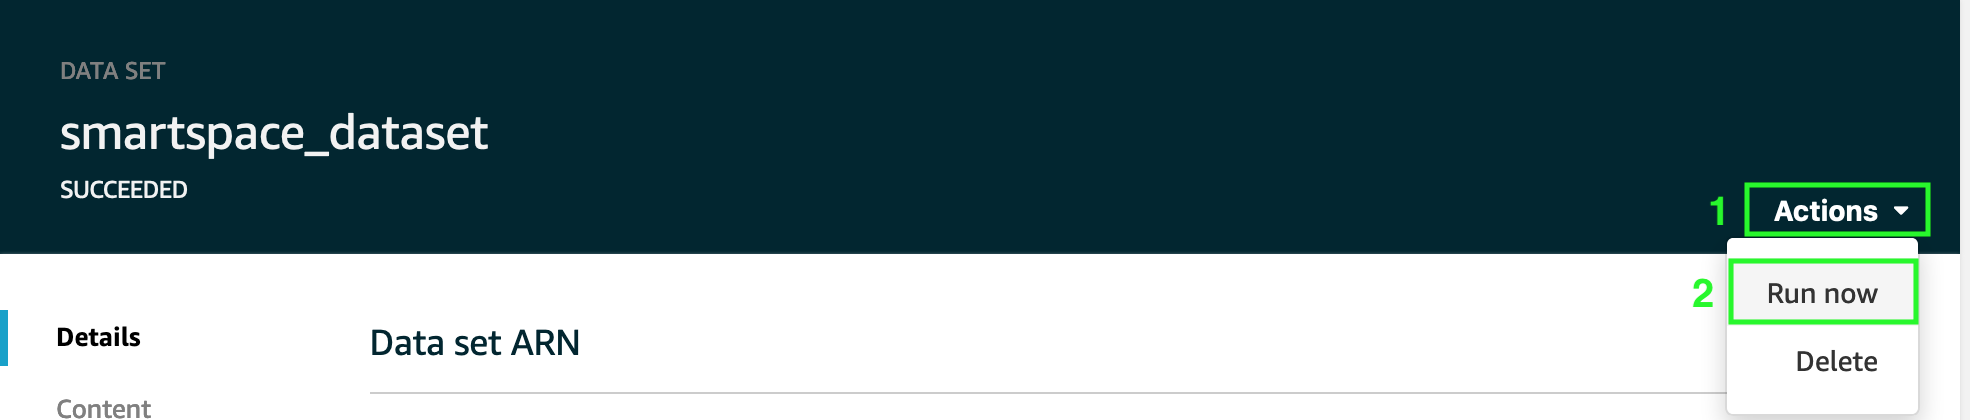
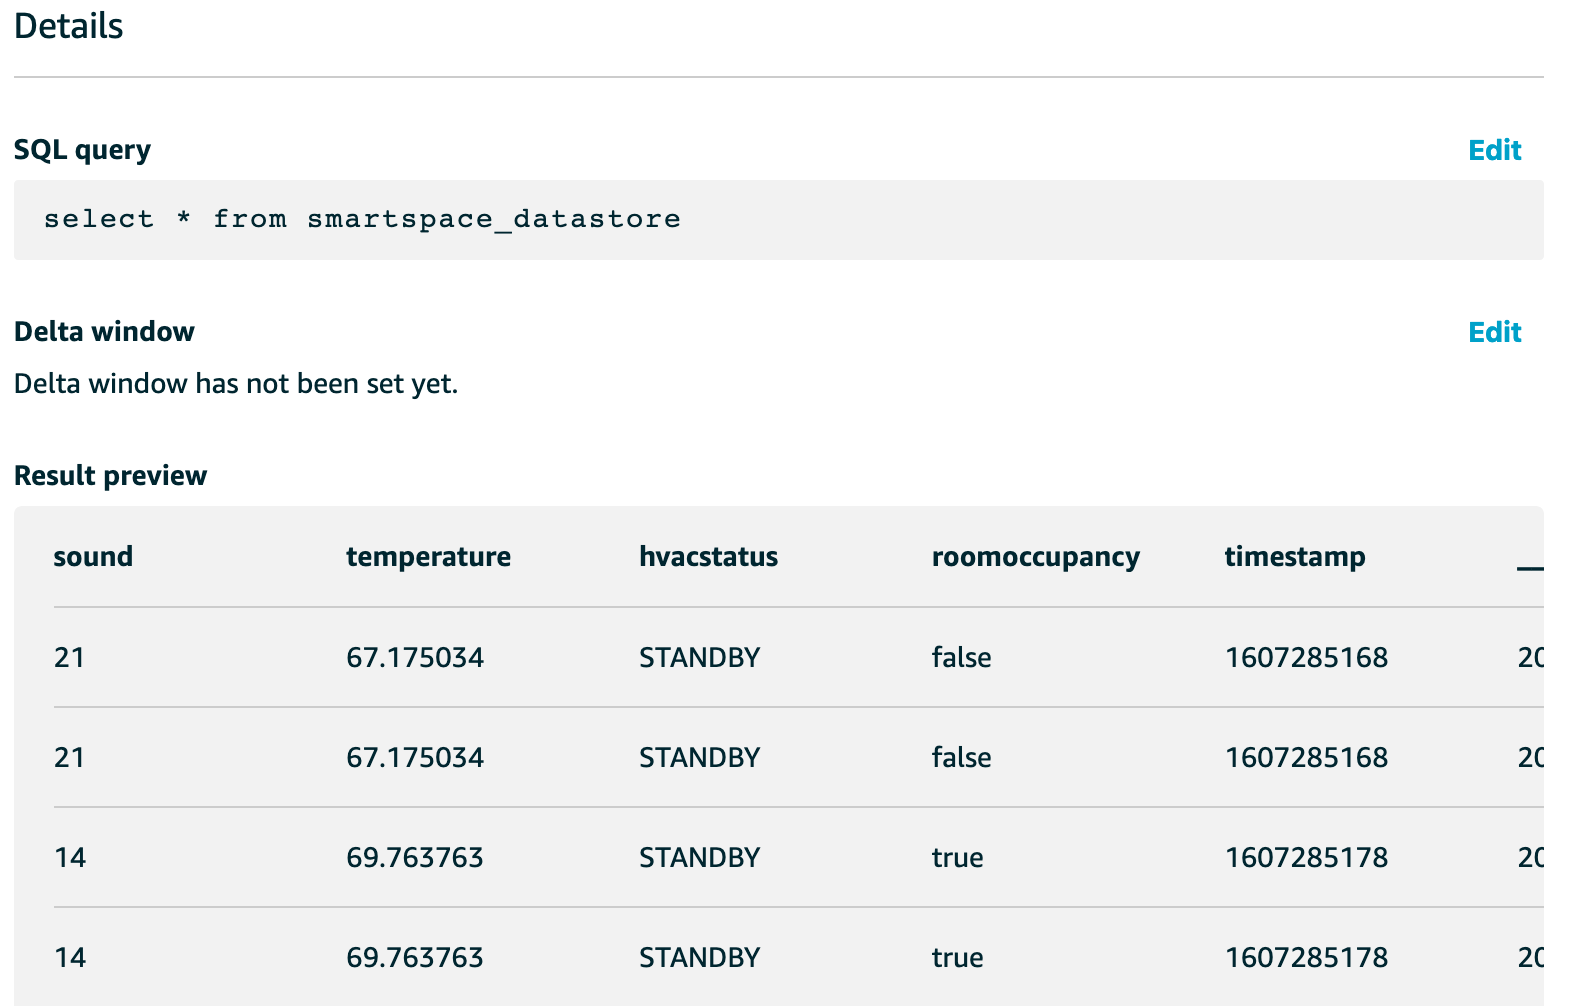
- To generate a data set that will be saved to your new Amazon S3 bucket for training, choose Actions then Run now. You should see the Result preview update when the data set content is done generating.
You are now ready to start your ML experiment back in SageMaker Studio. An experiment will use the reported thermostat data that was just exported by your IoT Analytics data set as inputs. You will configure the experiment to look for ways to accurately predict the existing roomOccupancy column. The automatic training job will analyze your data for relevant algorithms to try, then run 250 training jobs with varying hyperparameters, selecting the one that gives the best fit to your input training data.
Before starting your ML experiment, you should have several hours of data reported from your thermostat in the room you want to analyze, and in that time the room should have had a mix of active and inactive periods. An automatic ML experiment needs at least 500 rows of data to work, but the more data you bring the better the result will be. If you still need to generate more data before proceeding, don’t forget to re-run the data set in the IoT Analytics console (last step of the previous instruction list) so that those results are available to SageMaker in your project S3 bucket. When you’re ready to start your experiment, read on.
- Return to your SageMaker Studio, open your project, select the Experiments tab and choose Create autopilot experiment.
- Give your experiment a name.
- Under Project select your project from the list.
- Under Connect your data and S3 bucket name find and select your project’s S3 bucket in the list. This is the same one you selected for the IoT Analytics data set content delivery rule in the previous chapter.
- Under Dataset file name find and select your IoT Analytics dataset content like
data/smartspace/Version/1607276270943_3b4eb6bb-8533-4ac0-b8fd-1b62ac0020a2.csv. - Under Target choose
roomoccupancy. - Under Output data location and S3 bucket name find and choose the same project S3 bucket in this list that you picked in step 4.
- Under Dataset directory name type in
output/smartspaceand choose Use input as S3 object key prefix “output/smartspace”. This defines a new prefix in the S3 bucket that will be used for your output files. - Choose Create Experiment to start the automated ML experiment.
Running the experiment might take minutes to hours. You can follow along the experiment’s progress in the SageMaker Studio browser tab, but it is also safe to close the tab and come back later to check progress.
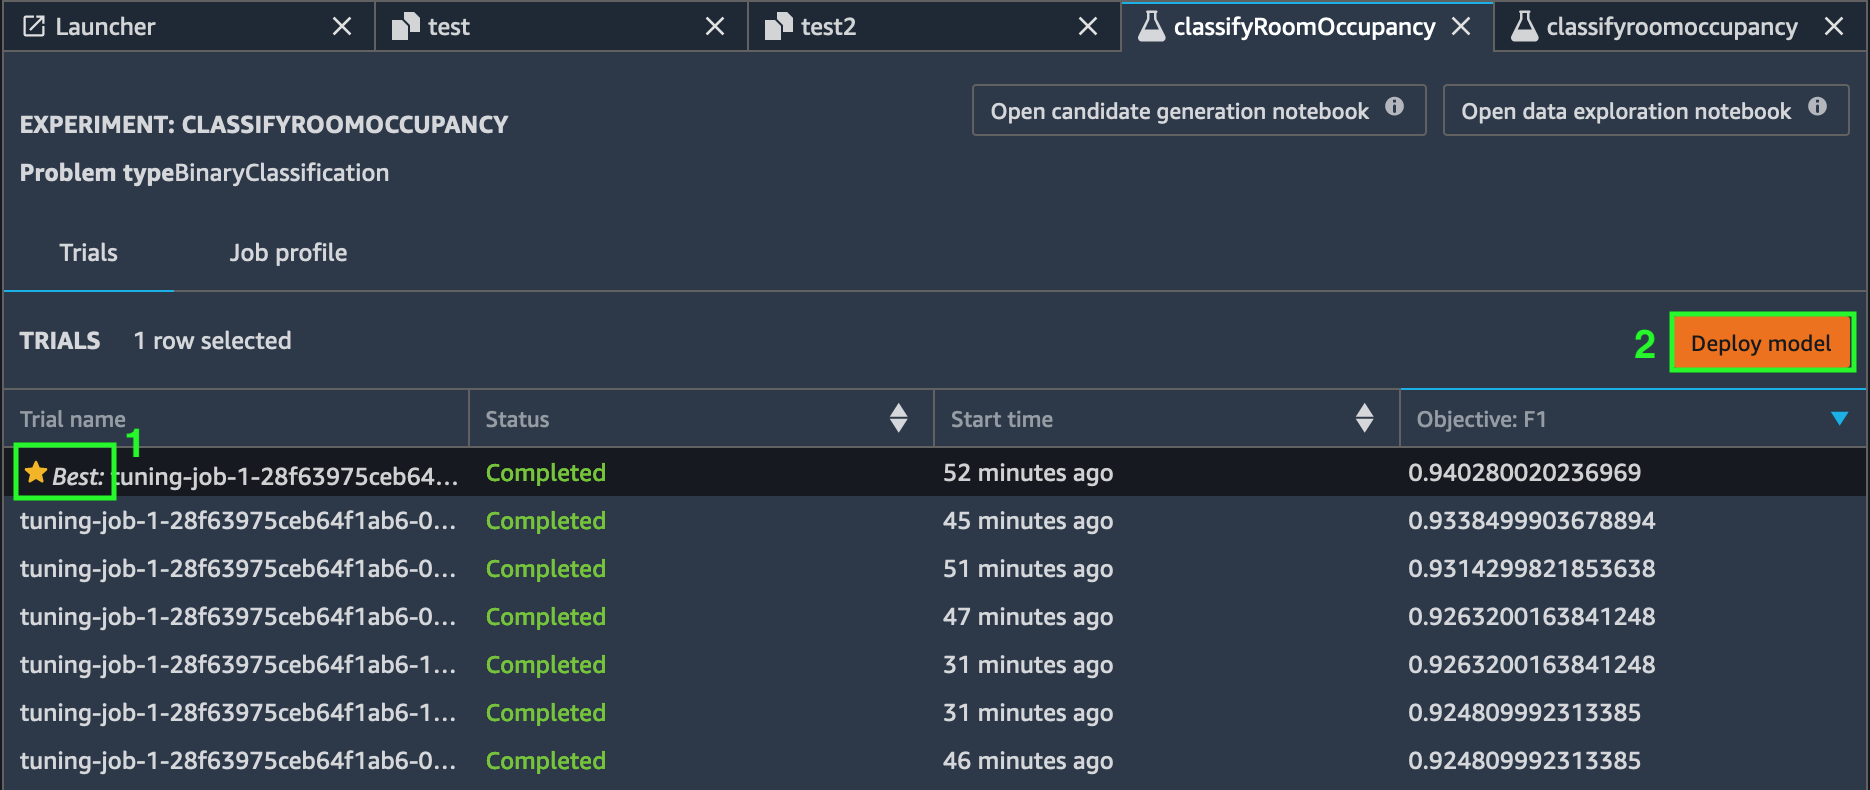
Once the experiment has concluded, the resultant output is 250 trials that SageMaker used to find the best tuning job parameters. Sort the table of trials to find the one marked Best. The next milestone is to deploy this trial as a model endpoint so that you can invoke it as an API.
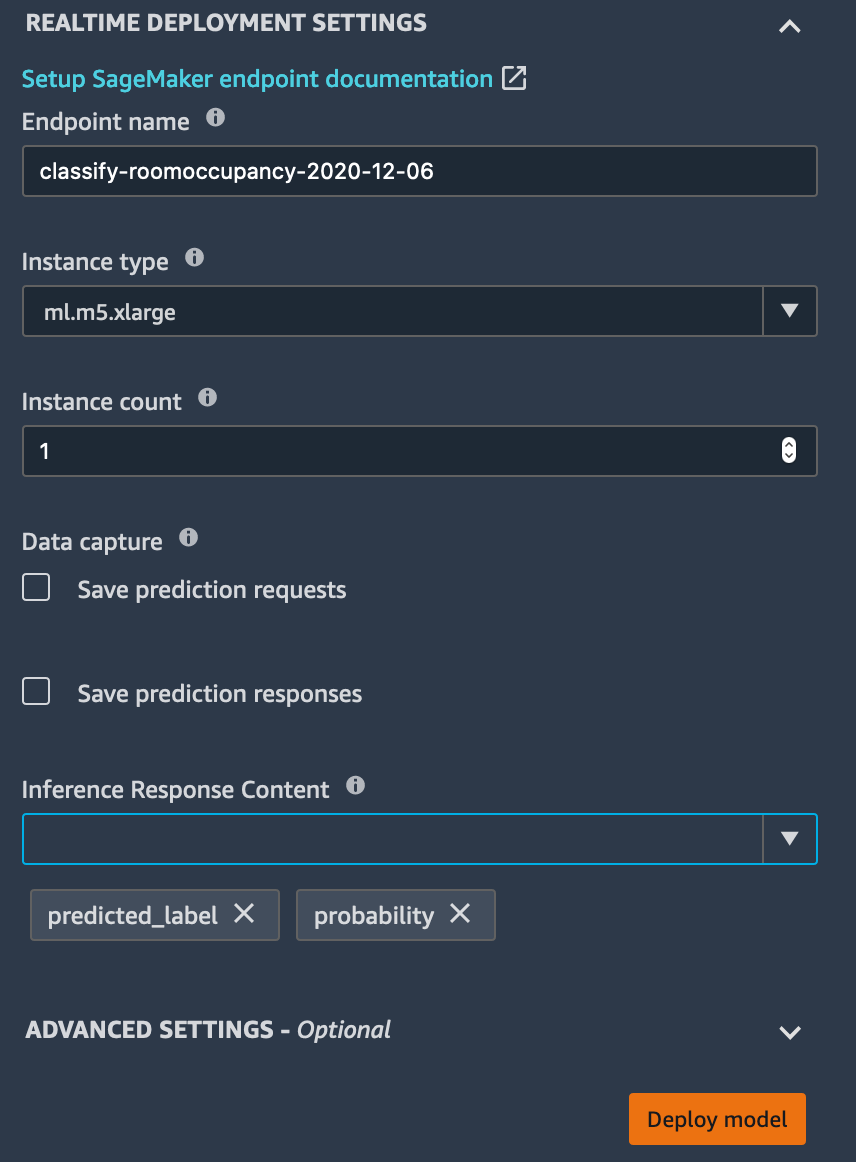
- Select the trial marked Best and choose Deploy model.
- Give your endpoint a name. Further steps in this module assume the name
roomOccupancyEndpoint. - Under Inference Response Content, select both predicted_label and probability. predicted_label may already have been added to the list.
- Choose Deploy model to tell SageMaker to deploy your model as a new consumable API endpoint. This will take several minutes.
Now your machine learning model is deployed as an API endpoint, managed by Amazon SageMaker. In the next chapter, Working with ML models, you will consume the API endpoint with a serverless function and replace the simple threshold logic in the IoT Core rule that determines the roomOccupancy value with inferences generated by your model.
Leaving this application running beyond 6 hours can result in AWS charges due to the number of requests to the S3 bucket. We recommend you finish this tutorial in that time and perform the cleanup steps to avoid any unwanted costs.
Validation
Before moving on to the next chapter, you can validate that your serverless application is configured as intended…
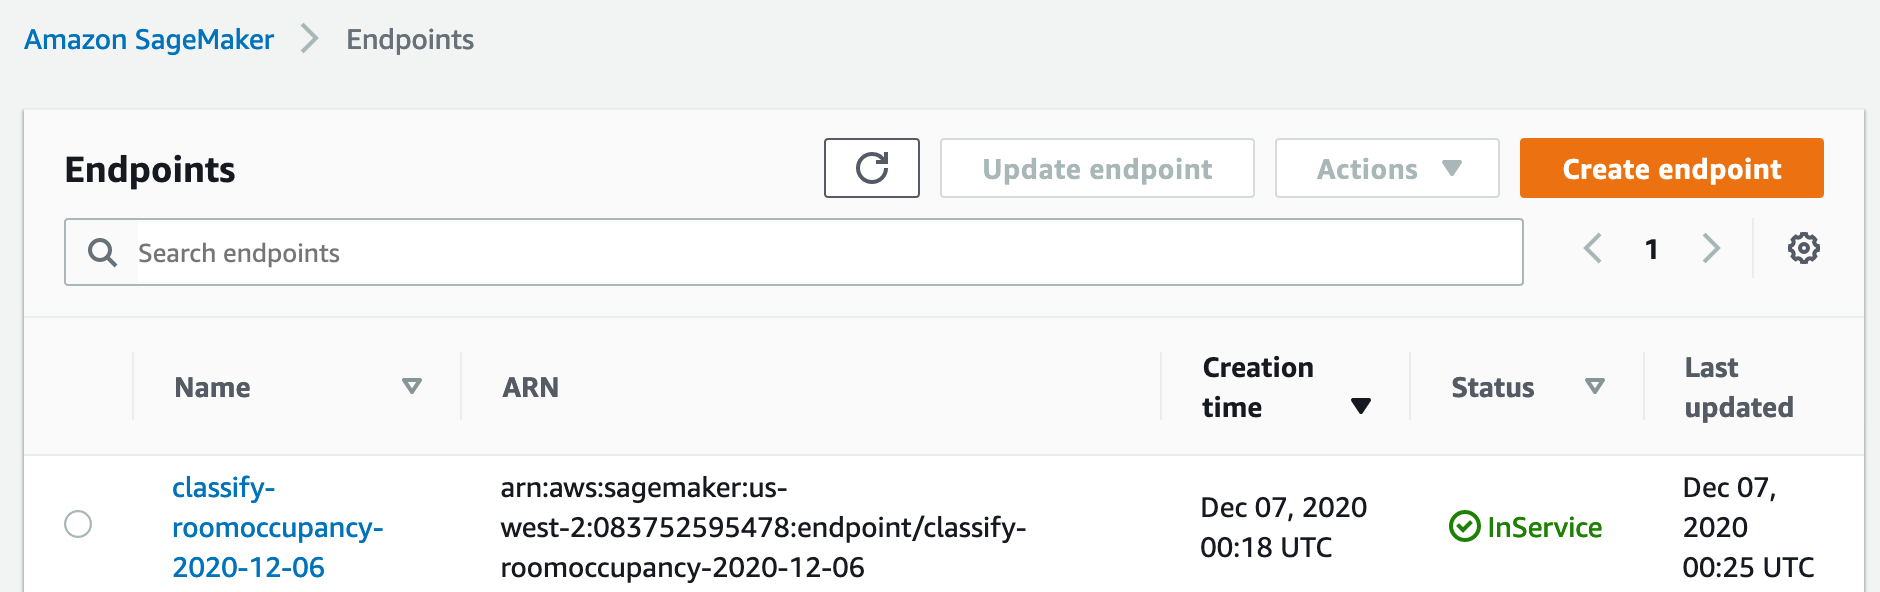
- Use the Amazon SageMaker console to see your new endpoint with status InService, on the Endpoints page.
If these are working as expected, let’s move on to Working with ML models .
Questions? Please use AWS re:Post
AWS IoT Kit now features direct access to
AWS re:Post
, which is a community-driven, questions-and-answers service. Search re:Post using the
AWS IoT Kit
tag to see if your question has been asked and answered. If not, ask a new question using the AWS IoT Kit tag.