Blinking the LEDs
Through the previous lessons, you configured your device software. It’s now running, and you are connected to AWS IoT Core. Your device is sending messages to the cloud, and is ready to receive and act on messages from the cloud. In this lesson, you will subscribe to an MQTT topic , view the messages that AWS IoT Core receives, and send an MQTT request to blink your device’s LEDs.
MQTT is a publish-subscribe protocol . This means that you can subscribe and publish to specific topics. The policy that the registration script created defines these topics. Your device can only send or receive messages to AWS IoT Core through the topics that satisfy the AWS IoT policy’s parameters and match the client ID. In our case, the client ID is the same as the device’s secure element’s unique serial number. Understanding this process is critical, so that you can filter messages and secure communication.
Subscribe through the AWS IoT MQTT client
The AWS IoT MQTT client in the AWS IoT Core console allows you to both view and publish MQTT messages.
Complete the following steps to subscribe to an MQTT message topic:
- Log into your AWS Account.
- Navigate to the AWS IoT console
- Expand Test in the navigation pane and choose MQTT test client to open the client view.
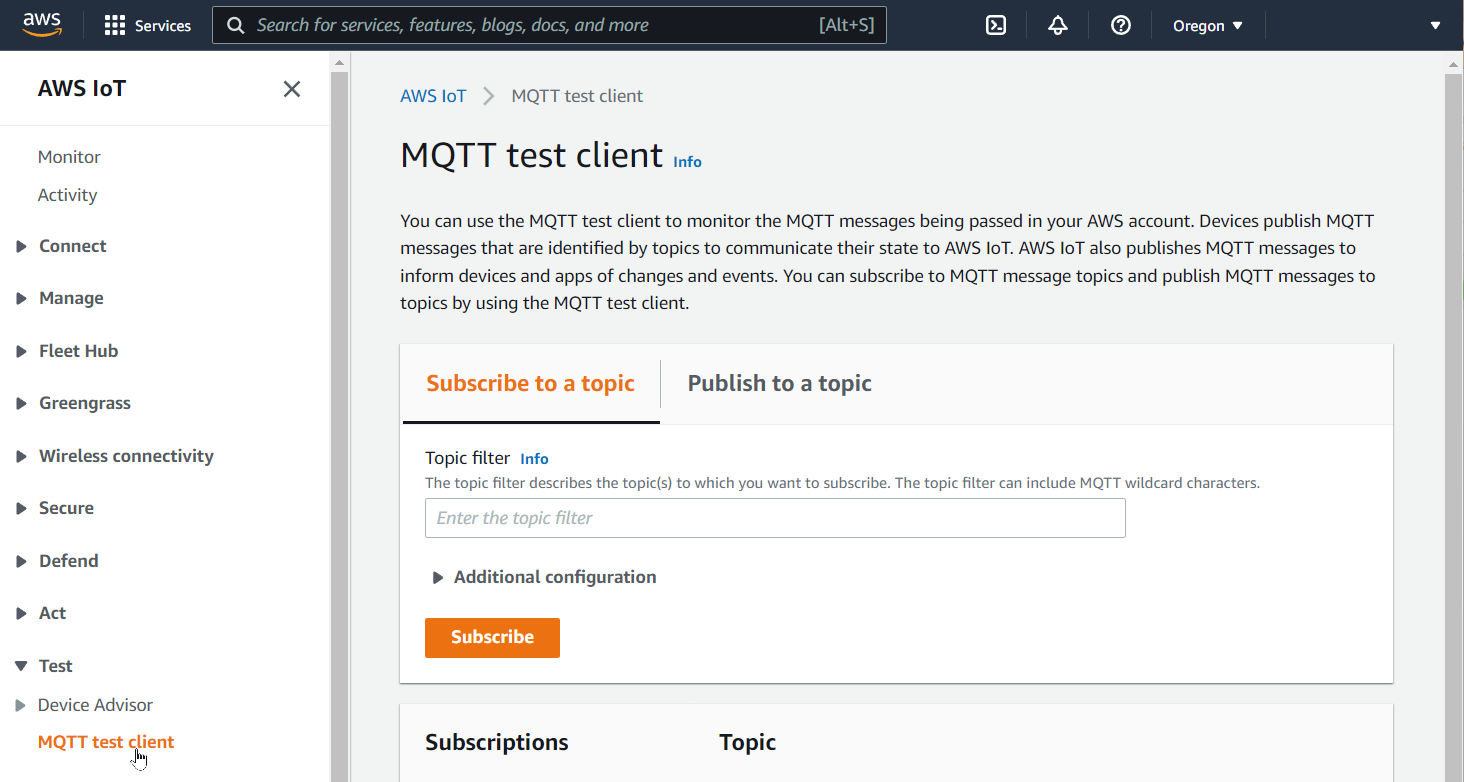
- Confirm that the Subscribe to a topic tab is active in the MQTT test client window.
- Enter # (hash symbol) in the Topic filter field to subscribe to all MQTT topic names. (The hash symbol, #, is a multi-level wild card topic filter and can only be used once and as the last character of a topic filter.)
- Choose Subscribe.
The messages that your device sends to the cloud will begin to appear. (Note: It can take a minute or two before they appear.)
Because of the policy constraints, the device can only publish messages to the topic beginning with its client ID. This provides flexibility, so that another subscriber (such as a cloud application) can filter topics for specific devices. Filters can also be applied to display more specific topics, such as a specific device’s temperature readings.
Blink the LED
To start or stop blinking the LED bars on the side of the Core2 for AWS, publish a message to the device from the AWS IoT MQTT client in a topic that the device subscribes. The subscription topic for the device will have the pattern <<CLIENT_ID>>/#. You can view the subscription topic on the device after it successfully subscribes to the topic. Additionally, you can view the client ID that’s been output on the host machine’s serial monitor.
Complete the following steps to begin blinking the LED bars on the device:
- Begin in the AWS IoT console.
- Expand Manage in the navigation pane, and choose Things.
- The Things page displays all the devices that are registered in your AWS account for this Region. You should have one listed with a microchip-tng Thing type–this is your Core2 for AWS device. Write down this device’s name because it is your AWS IoT device ID.
- Expand Test in the navigation pane, and choose MQTT test client window.
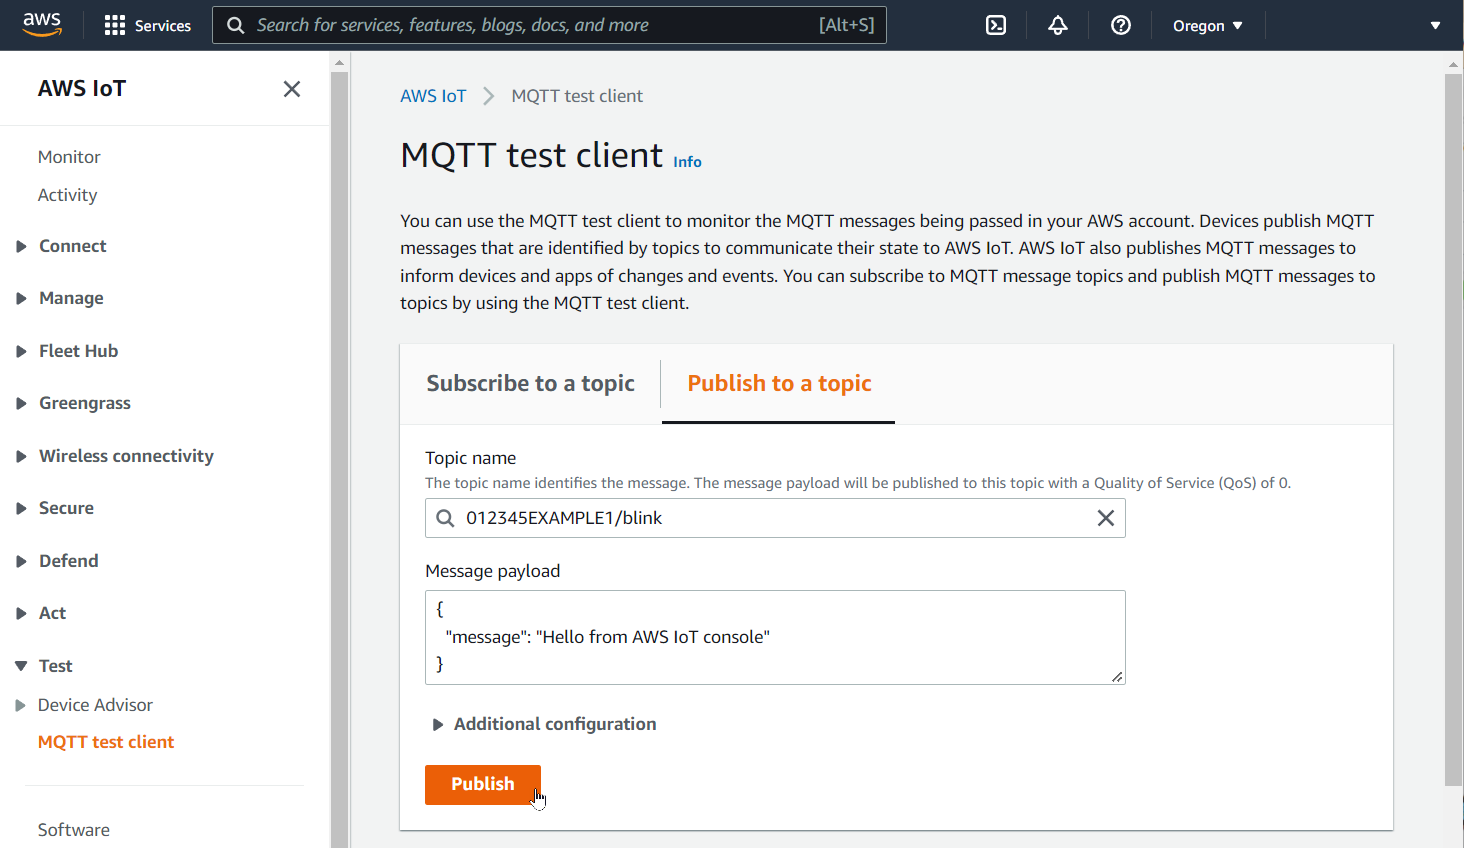
- Choose the Publish to a topic tab.
- Replace «CLIENT_ID» in the following code and enter the topic into the PubTopic name field:
<<CLIENT_ID>>/blink
- Leave the default message in the Message payload field and press Publish. (Note: the message that you sent to this topic doesn’t matter. The device will turn on or off the lights based on any published message to this topic.)
Your device’s LED bars should now blink. To pause the lights, press the Publish button again to publish another message to the same topic.
To exit the PIO serial monitor, return to VS Client and press CTRL+C.
Clean up
To avoid unwanted possible AWS Cloud service charges and optimize your resources, erase the flash memory on your device. This will also prepare it for subsequent tutorials.
Complete the following steps to erase the flash memory on your device:
- Open VS Client, if necessary.
- Open the PIO terminal.
- If a project is running, press CTRL+C to stop it. If there isn’t a project running, continue to the next step.
- Issue the following command in the PIO terminal:
pio run --environment core2foraws --target erase
When the command in the terminal window completes, the Core2 for AWS may not automatically restart or appear to be different. Power the device off and then on to confirm that the firmware was flashed.
Erasing the firmware results in a blank device screen and an audible ticking sound. This is expected behavior. The device is continually rebooting itself because it doesn’t have an application to run.
Congratulations! You successfully communicated to your Core2 for AWS and blinked its LEDs. Now you are ready to complete the final lesson of this tutorial, Conclusion .
Questions? Please use AWS re:Post
AWS IoT Kit now features direct access to
AWS re:Post
, which is a community-driven, questions-and-answers service. Search re:Post using the
AWS IoT Kit
tag to see if your question has been asked and answered. If not, ask a new question using the AWS IoT Kit tag.